Hip Release Stretch Flow
I’ve recommended the benefits of the Legs Up The Wall stretch before this and continue to recommend it highly to many of my clients.
I’d like to share my personal stretch routine that I do regularly to release my back and hips. While many factors including regular physio, rehab and low impact exercise have all worked together to reduce my hip pain (from FAI), this routine is what I truly believe has been the game changer.
If you want to see permanent change in your body then it’s up to you to do the work. Your physio and trainer can help you and guide you, but after that you need to take responsibility for yourself. Spending 15 minutes 5 times a week isn’t much and could save you time, pain, and money by taking simple ownership of your body.
There are times when I am very sore through my hip and knee and some of these stretches are very uncomfortable. On those days I persist and work through the stiffness. It's never a question of just stopping. Rest does not fix stiffness. Movement fixes stiffness.
Let me clarify that.
If the stretch is feeling difficult then I persist but spend more time breathing and relaxing into the pose and gently moving my body towards where I want it to be. I NEVER force any of the stretches and I actively concentrate on my breath to exhale and release the tightness to the best of my ability.
That might mean coming out of the stretch till I’m a little less defensive with the pain and then resetting to continue.
This is all experimentation and needs to be done at your own pace and level. What works for me will not necessarily work for you. But play with it. Experiment. Take notes. See what benefits you. If something actively hurts – stop. Revisit it at another time and re-test.
Be gentle with your body. This flow is about using your mindful breath to let go of tension. We’re using passive time frames to allow your body to settle as we’re working to release muscular, neural and fascial tightness – lots going on there, so don’t rush.
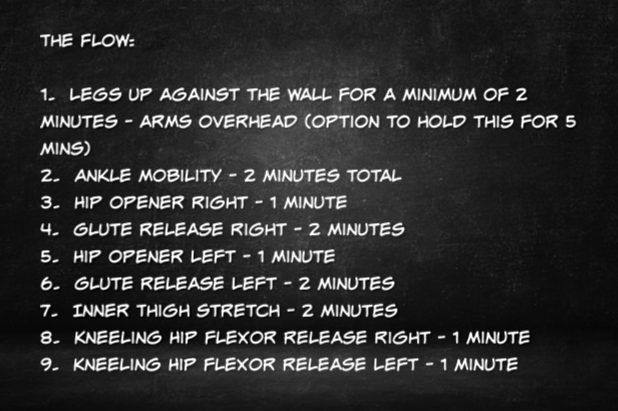
1. Legs Up against the wall – see my blog post here that explains this pose and how long you should hold it. I generally settle into this pose for at least 2 minutes before moving on. By gently flattening your lower back and removing joint pressure, you'll help to decompress tension throughout your entire back and spine.
If you suffer from a lot of tension in your life, let alone stiffness throughout your joints - I'd really recommend staying in this pose for at least five minutes. If you're tight in your upper back, it'll take that long for your arms to relax behind your head! This is a restorative yoga pose - take your time.
2. Ankle mobility - Our feet cop a beating! They do SO much work and how often do we stretch them or mobilise our ankles? Add in some generous ankle circles and alternate between circles and pointing and flexing your feet. Listen to the joint crackle and groan in relief and maintain this for another two minutes.
3. Hip opener – start this release by drawing your right ankle across your left knee. Gently push the bent right knee away to open up your hip. Heads up – this won’t be very comfortable. Don’t just hold this hip opener – push away for four seconds, then release. Repeat, keeping up that gentle release as a resist relax movement. Repeat for at least a minute.
4. Glute stretch – Staying in the hip opener position from above, bend your left leg a little drawing that left knee towards you. This will pull the bent right leg closer to your chest and create a stretch through that right glute. Once again, we’re keeping this very low key and passive. Stick with that 4 second resist relax rhythm so that you “gentle” the glute muscles into releasing some tension. Spend AT LEAST a minute here. More if you can.
I lOVE this version of a glute stretch rather than a sitting glute stretch, because it uses the resistance of your own leg pushing against the wall, allowing you to absolutely control the degree of the stretch without impacting your low back. It keeps your body more aligned in the stretch and doesn't require you to reach anywhere or lift your head from the floor. I'm all about modifying stretches so that they're easier and accessible to everyone regardless of your size or your flexibility.
5 & 6. Repeat steps 3 and 4 on your other side.
Take the legs back to your starting position of straight up the wall and repeat your ankle mobility exercises for about 30 seconds before moving on.
7. Inner Thigh Stretch - Allow both legs to fall out wide into the "splits" turning your toes outward. We’re working towards a groin stretch and release of long adductor muscles (inner thigh muscles that cross the inside of the knee) so expect that if you’re tight, this could be really pull. Just keep the stretch passive and focus on your breathing (your exhale in particular to relax) and hold this as long as you can, comfortably.
If it feels too intense, come out of it, reset and then continue ensuring you’re never forcing the stretch or forcing how wide your legs are. This is a passive stretch – please just take it softly. Work to holding this stretch for 2 minutes.
Come out of your wide leg stretch very slowly and carefully and bring your knees to your chest for a quick stretch and roll yourself to the side and come up and away from the wall.
Tight hips and sore knees tend to go together like bangers and mash! So let's add in a hip flexor release. A good lunging hip release unfortunately usually requires some pressure on the knee. Add in a cushion/towel or anything that protects the kneecap and lets you concentrate on the hip rather than being distracted by knee pain.
I actually do this stretch while kneeling on the end of my bed or edge of a couch, as that completely supports the knee, is a convenient height and takes all the pressure off the knee cap and allows me to really stretch out through the front of the hip and hold that in a supported pose long enough to get a sustained release.
8 & 9. Kneeling Hip Flexor Stretch. Step the front foot as far as it can go, ensuring the knee is directly above the ankle for best alignment. Extend the rear leg back as far as it can go to open up the hip. Again, think about that 4 second resist release rhythm to gentle tight muscles into releasing. Repeat for a minute per side.
And there you have it – less than 15 minutes of a low key, breath based, predominantly passive stretching routine.
No force, no strain – just a gentle flow that aims to decompress your spine and hips hitting all those tight spots; inner thighs, groin, hip flexors, glutes and back. Make this a regular commitment and you'll soon see positive results.


